Rithmic Data
To configure a Rithmic data connection to which you have subscribed, follow these steps:
1.Log in to the Tickblaze platform, if you haven't done so already.
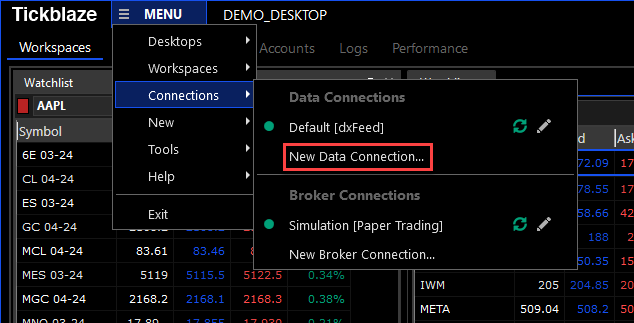
2.Click on "MENU" on the top left area of the Tickblaze desktop window bar.
3.Select the "Connections" sub-menu item.
4.Select the "New Data Connection..." sub-menu item (shown in the red rectangle below):
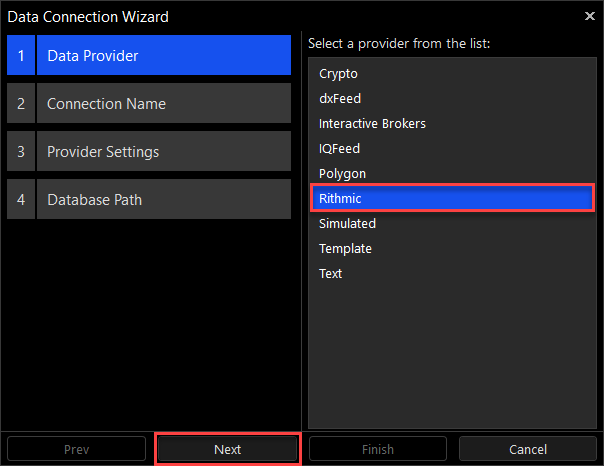
5.The Data Connection Wizard window will appear as shown below:
6.Select the "Rithmic" data provider name from the list and click on the "Next" button.
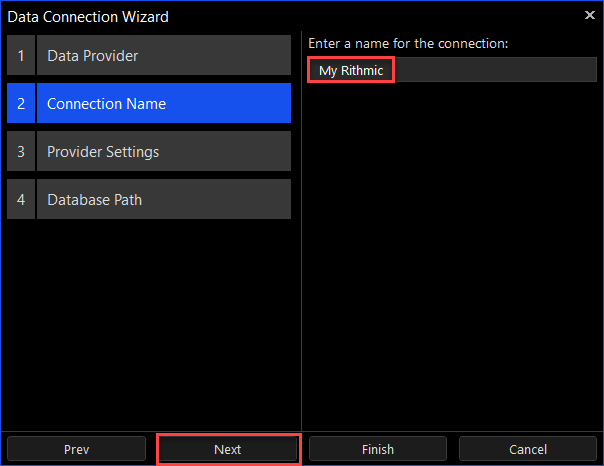
7.Enter a unique name for the data connection and click on the "Next" button.
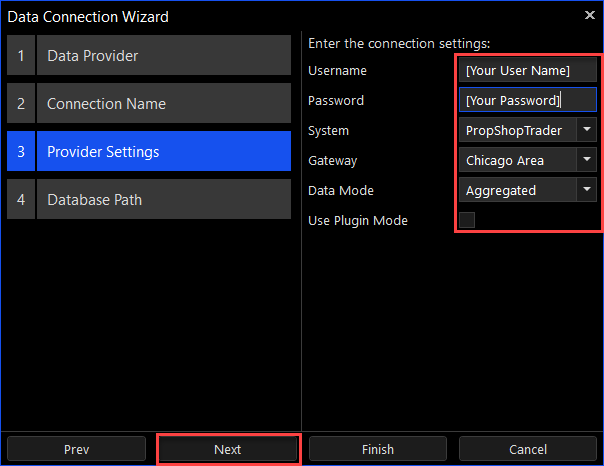
8.The Data Connection Wizard window will appear as shown below.
9.Enter the user name and password for your data connection and select the appropriate selections for the "System", "Gateway", "Data Mode" and "Use Plugin Mode" settings per the instructions provided by your data provider (this settings list applies to the Rithmic data connection example - Each data connection service may have unique configuration settings).
10.Note: The System, Gateway and Data Mode settings vary depending on the specific data provider. For example, for AMP Futures, the Data Mode setting will be "R/Trader", while for other brokers this Data Mode setting will be "Aggregated".
11.Click on the "Next" button.
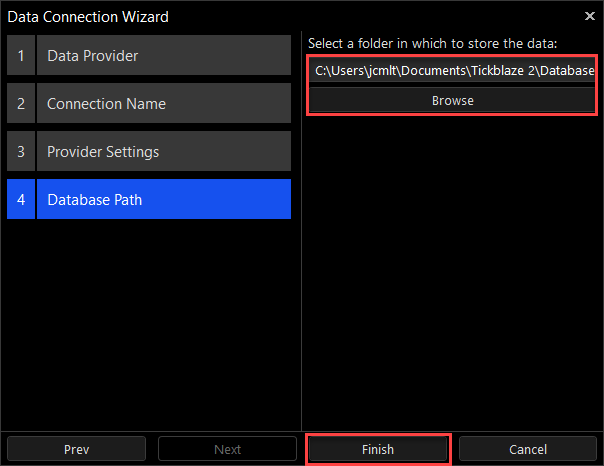
12.Set the folder location for storage of the database, or keep the default path (Recommended) and click on the "Finish" button.
13.The new data connection will now appear as an available data connection in the Tickblaze Desktop MENU/Connections sub-menu as shown in the red rectangle below:
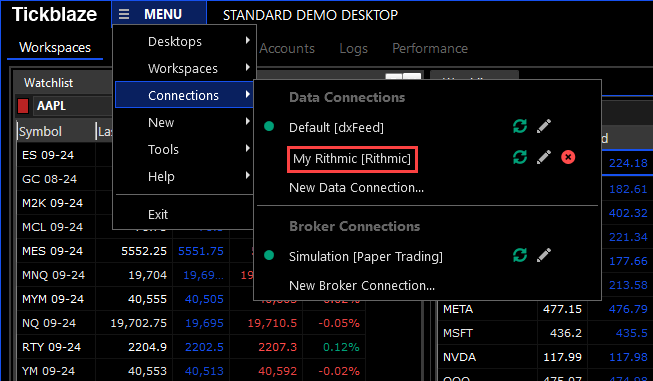
14.To switch from the current data connection to one of the other available (configured) data connections, simply click on the desired data connection. The current data connection will be disconnected, and the newly selected data connection will connect.